Getting Started with Mowmo
January 21, 2019In this post, we’ll be going over how you can start scheduling jobs and being productive with Mowmo in less than 5 minutes. We’ll go over the steps to accomplish the following.
- Fill out company information.
- Create our first client!
- Add an account (a property) to our client.
- Schedule a job at the account we created.
Afterwards, we walk through the ‘On the Job’ experience for when you are out mowing. Let’s get started.
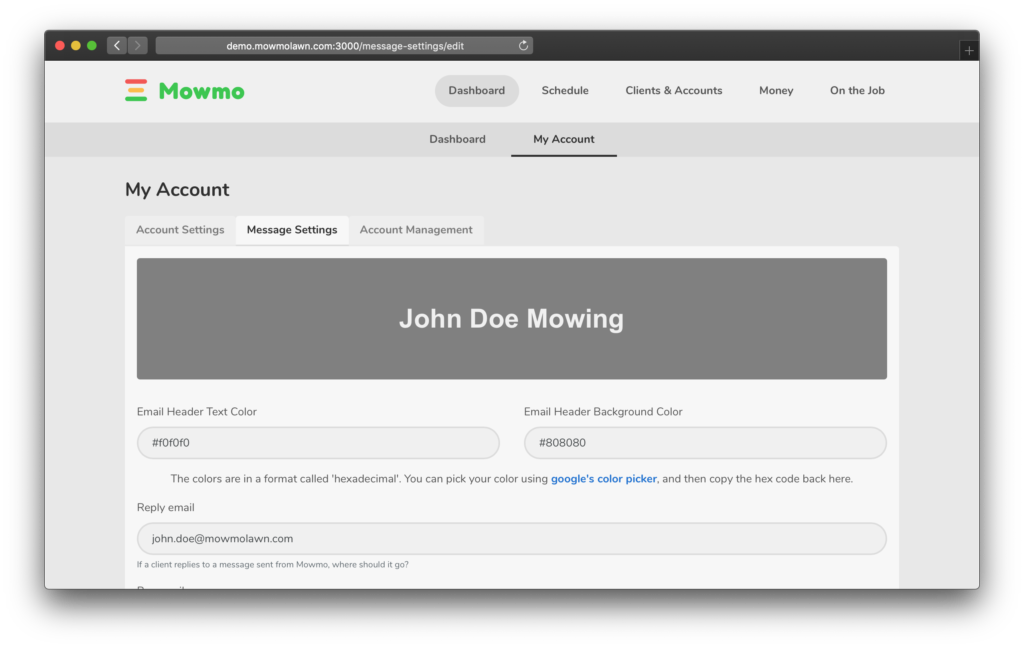
Company Information
If you’ve just made your account, you will see a notice asking you to update your account settings. If not, you can navigate to Dashboard / My Account. Toggle through the tabs for Account Settings and Message Settings being sure to fill it in properly with your information.
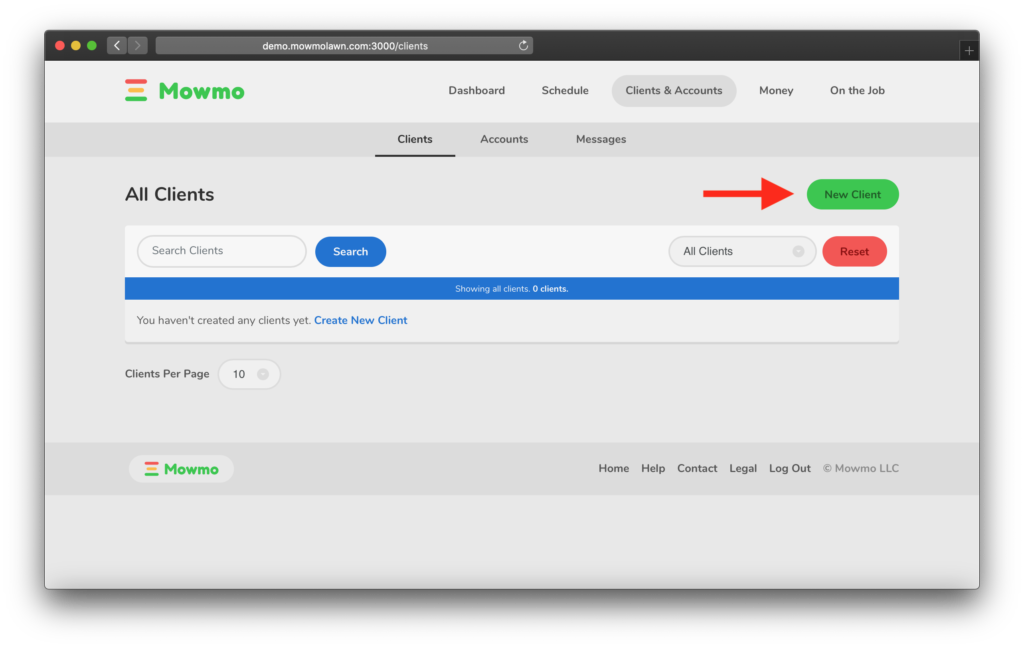
Creating a Client
Now we navigate to Clients & Accounts where we will see a button to create our first client. This will be fairly straight forward. You’ll notice you can add multiple email address and phone numbers for the client if you’d like.
Add an Account
In Mowmo, clients have accounts. And this makes sense, as it lines up perfectly with people (clients) having properties (accounts). So, we’ll create an account for our newly created client. Notice the fields for schedule and cost. Schedule will allow you (and Mowmo) to quickly and intelligently schedule jobs at the correct intervals. Cost will be the default cost that gets filled in when creating jobs at this account.
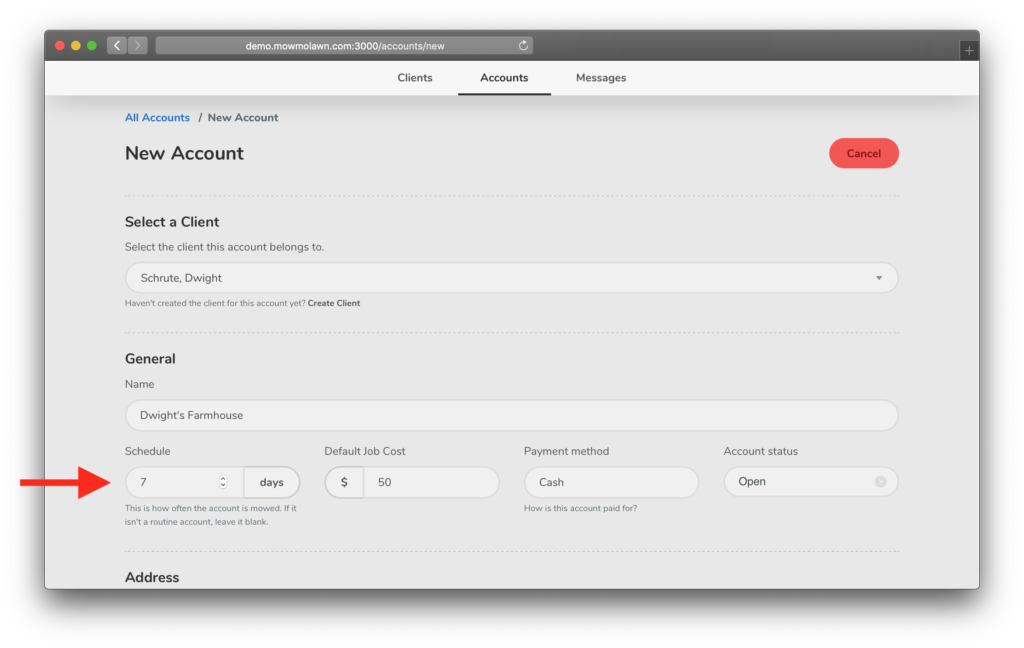
Another important option when creating an account is the toggle for sending job complete notifications. If checked, Mowmo will send an email to the client the instant that you complete a job. In order for this notification to be sent, either the client of the account needs a primary email address, or you need to provide an email address(es) in the provided text field.

Scheduling a Job
With our account, we can schedule jobs! Navigate to Schedule and you’ll notice a notification on the schedule button. This is because we have an Active account that doesn’t have any future jobs on the schedule. We can either click the notification, or the button to schedule the job. Notifications will show up here any time we don’t have future jobs scheduled for active accounts. This is very helpful for keeping on top of things.
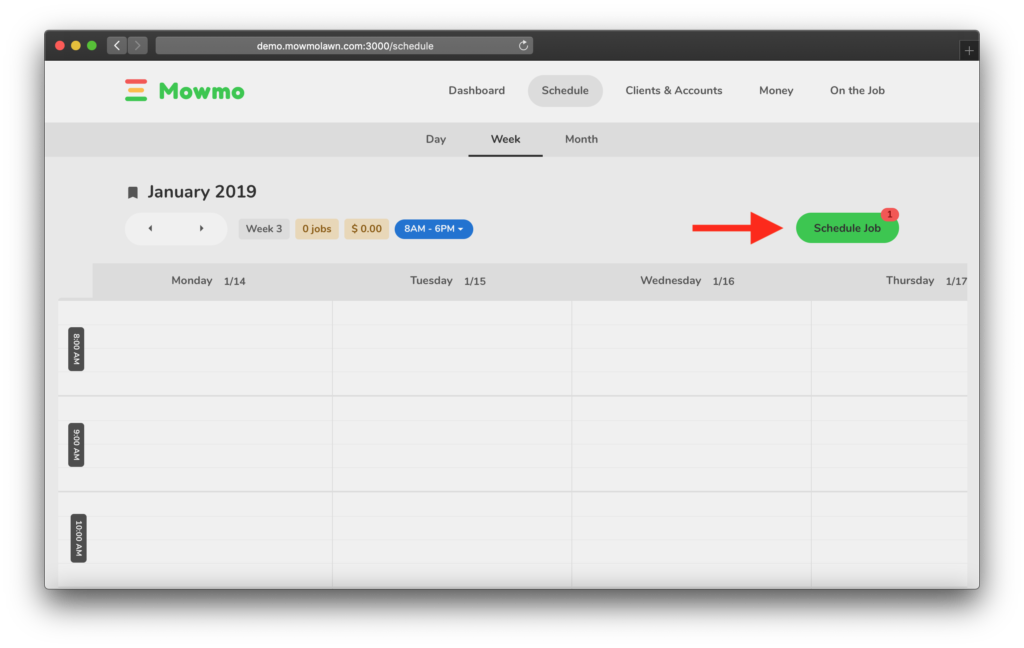
While we are here, let’s schedule a couple jobs at this account. In either the Day or Week view, we can select the job to reveal options for things we can do with the job. One of them is to schedule the next job! This is where Mowmo will tell us when the next job should be scheduled based on the default schedule set on the account.
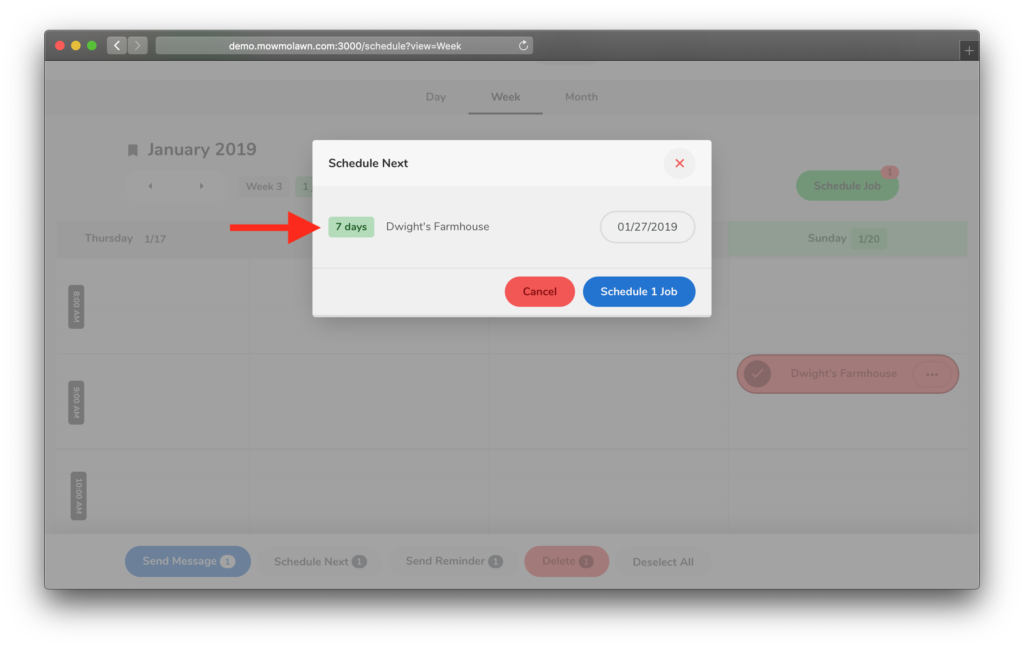
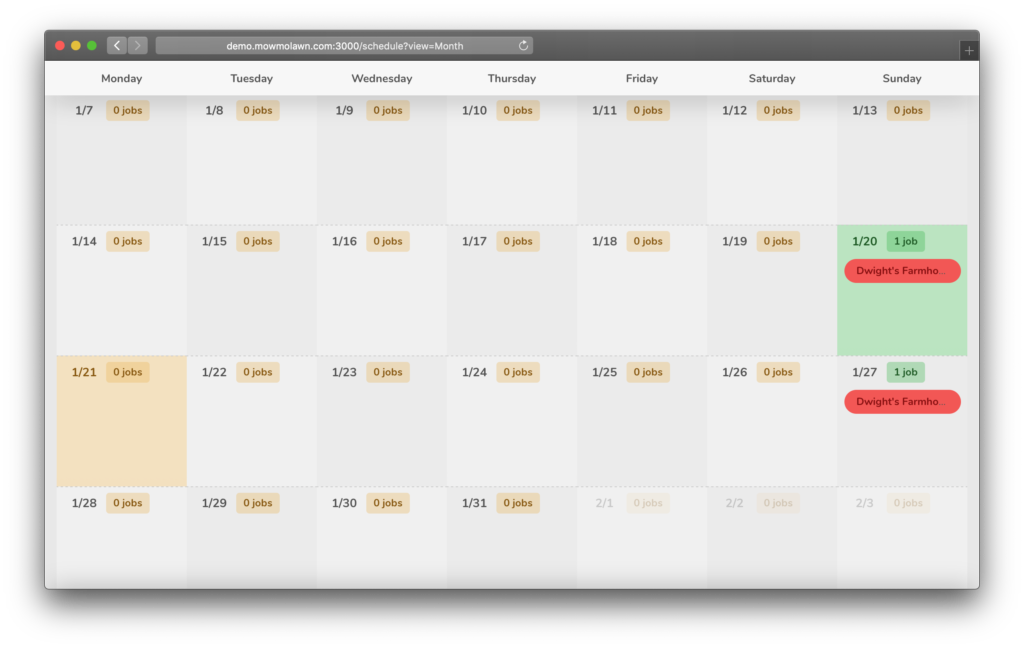
Now you can see there are 2 jobs scheduled.
Let’s Start Mowing
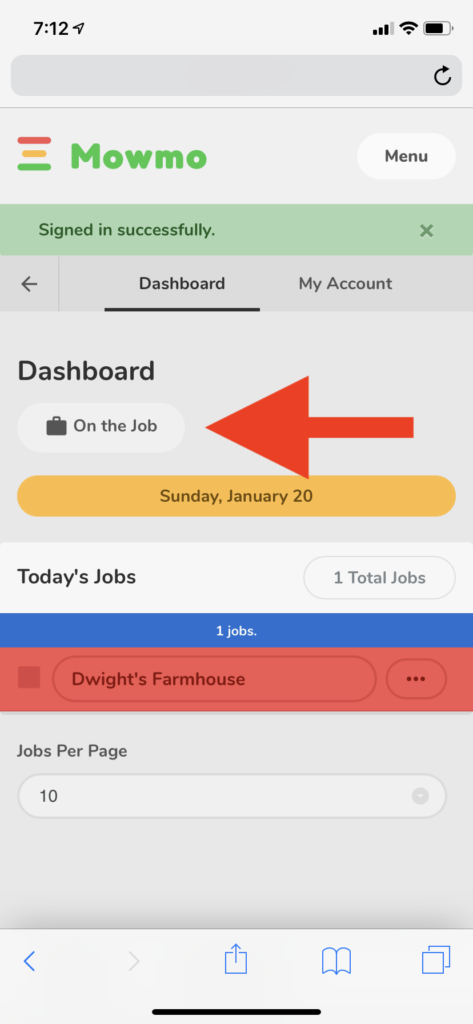
We’ll switch to our phone, because it’s likely that’s what you’ll have with you while you are out mowing. We’ll navigate to On the Job which is specially designed to be quick and easy.
When we get to a job, we hit start! Mowmo records the start time, and moves the job to In Progress.
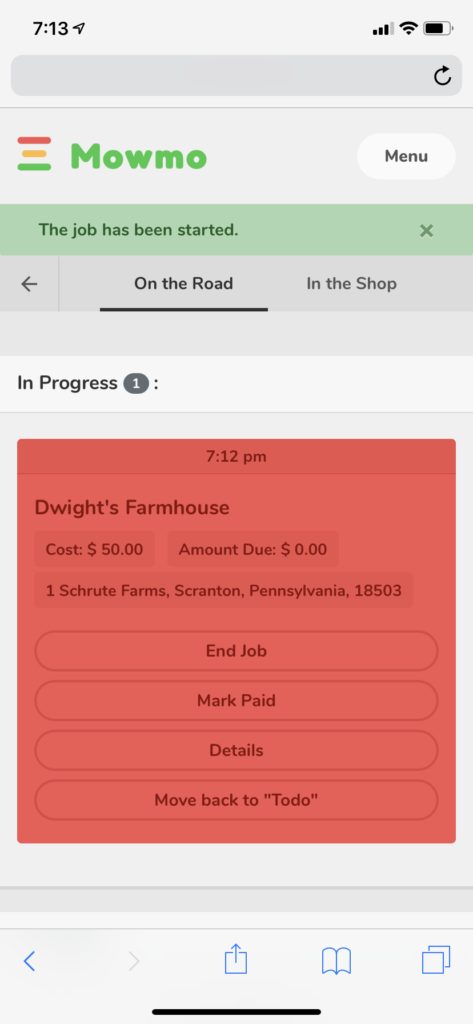
When we are done, we have the option to record a payment if the client was home and we received payment on the spot. Otherwise, you don’t need to do this.
Finally, hit the complete button, and away you go to your next lawn! Mowmo will record the end time, and optionally send a notification to the client if you have chosen. Here is the notification that was sent in this case.
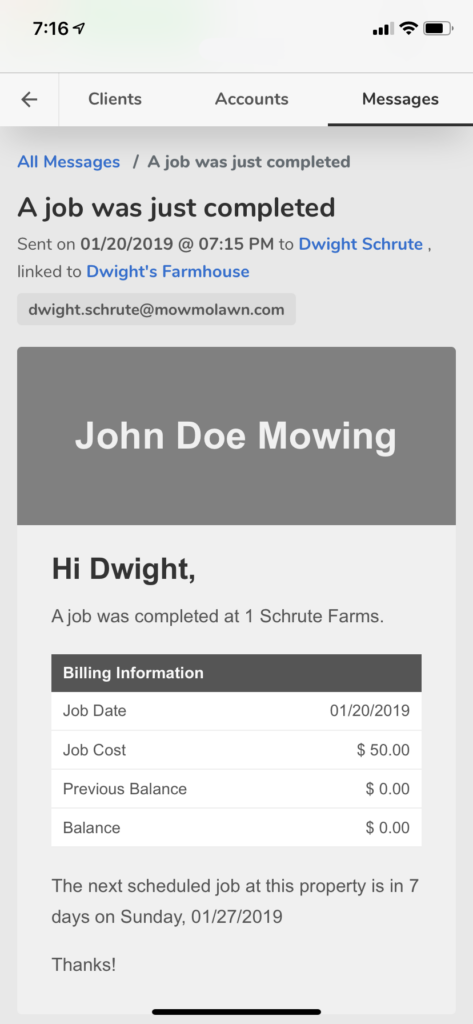
You’ll notice it informs the client of billing information, and when the next scheduled job is at this account. The information and formatting in this notification can be customized.
Wrapping Up
And that’s all it takes to become productive and organized with Mowmo. You’ll find options and settings to customize notifications and messages, as well as invoices on their related pages. As always, if you have any questions never hesitate to start a chat on this website or send an email to [email protected]. Happy to help and get you rolling for the season!
Questions about Mowmo?
View the help center or contact support to answer any question you may have.